
Some kitchen makeovers start with what’s pretty much a sledgehammer approach.
This one started with a question that’s rather more subtle:
What if the kitchen we’re working with is, in fact, already working just fine… and all it needs is a facelift for the cabinets to get some new mojo?
That was the starting point behind our recent home interior painting project in White Plains, New York. The before-and-after photos show a kitchen with a fair amount of existing cabinetry, granite countertops, a neutral tile backsplash, stainless-steel appliances, and some really nice crown molding. Rather than ripping everything out and starting over, we used professional painting to give the existing elements a whole new vibe.
The original warm wood cabinetry gave the kitchen a traditional, heavy-hitting look. After refinishing it with a lighter finish, the same cabinets suddenly feel brighter, cleaner, and way more connected to the rest of the interior.
This project’s a great example of just how much you can change the look of a space with painting – without having to break out the wrecking ball.
Project Overview
Where: White Plains, New York
What We Did: Residential Interior Painting, Cabinet Refinishing
Main Focus: The kitchen (with a focus on the cabinetry and surrounding interior surfaces)
Kept in Place: The original cabinet layout, decorative molding, countertops, backsplash, appliances, and overall kitchen setup
Design Direction: Going from warm wood cabinetry to a lighter, more cohesive painted finish
The Real Problem Wasn’t the Cabinets – It Was the Finish
A lot of times, when people aren’t happy with their kitchen, they immediately blame the cabinets.
Assuming that the cabinets themselves need to be replaced, that they’re outdated and all that.
But sometimes, the real issue is the finish on the cabinets.
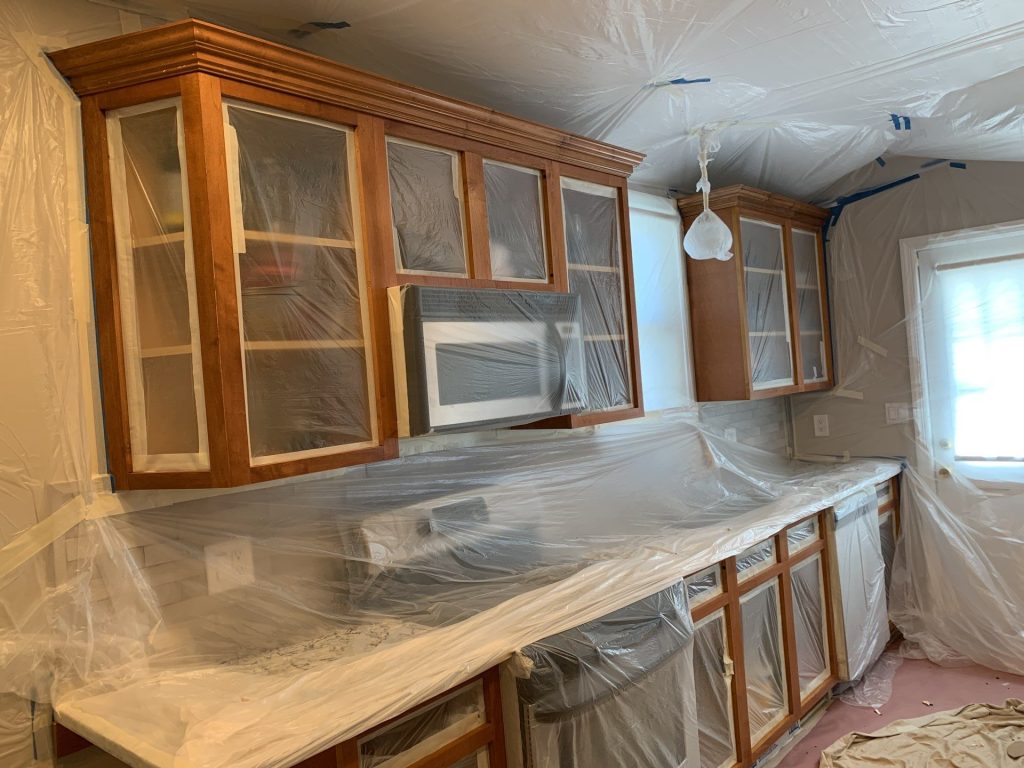
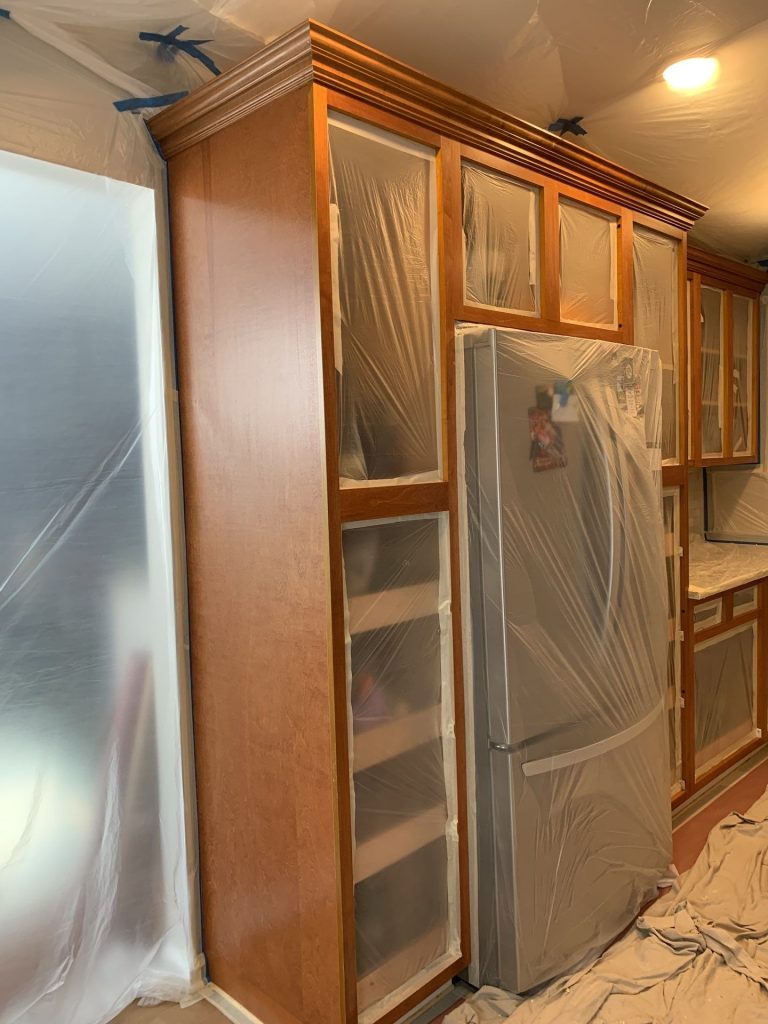
Looking at these before photos from a home in White Plains, you can see that the kitchen already had a lot of great elements in place: the cabinetry extended right to the ceiling, included all this beautiful crown molding, framed the fridge with tall storage, and had plenty of upper and lower storage to boot.
The granite countertops were already installed – and the neutral backsplash was already ready to go with just about any color direction.
And the stainless-steel appliances gave the whole space a modern look that would work great with a lighter cabinet finish.
All the kitchen really needed was for the individual pieces to work together better visually.
Before: A Room that was Getting Lost in all that Wood
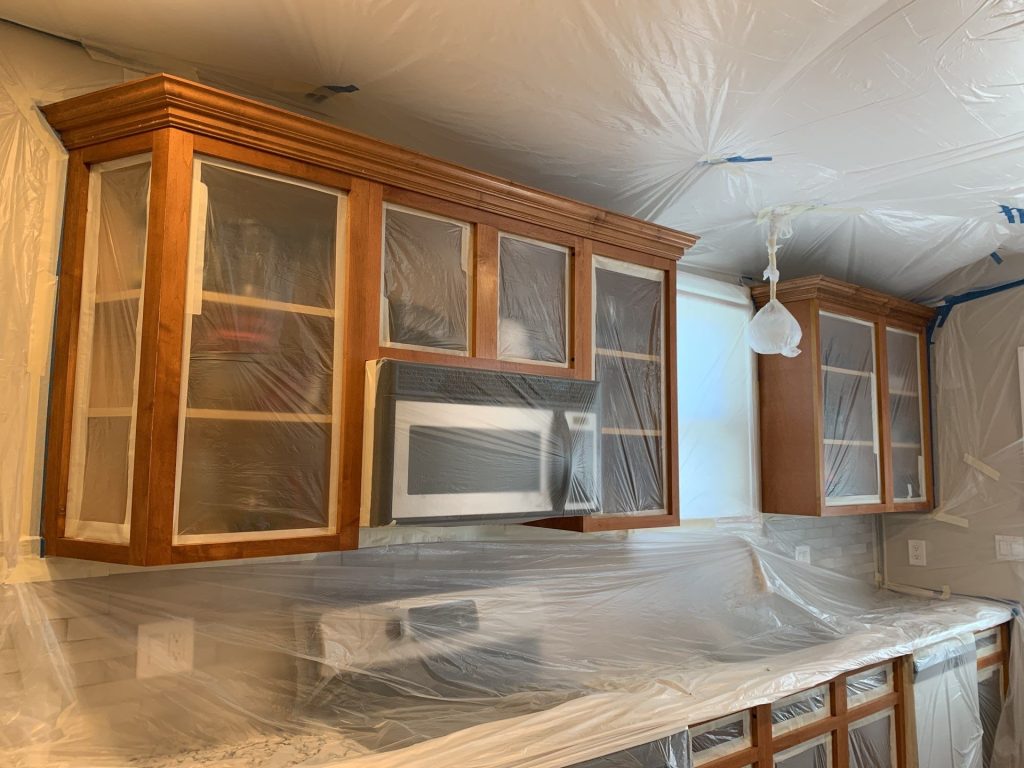
The original stained wood finish brought warmth and character to the kitchen – and it was a beautiful thing.
But the room had a lot of wood – and that meant the warm brown tone was really the dominant feature.
Against a granite countertop with all that natural movement, a dark tile backsplash, and dark flooring, the cabinetry started to feel like it was really overwhelming the space.
It’s not that there’s anything wrong with stained wood – it’s just that when you’ve got that much of it visible, it can be a bit much.
What was really needed was some balance.
And in a kitchen like this, changing the cabinet finish can make a huge difference – it can actually change the whole sense of the room’s weight.
That’s what happened here.
What the Prep Photos Tell You is Really Important
Let’s take a look at some of the photos from before we started painting – the ones that show us setting up to protect everything.
Countertops, backsplash areas, appliances, open cabinet interiors, adjacent walls and openings, the ceiling – pretty much everything that wasn’t getting painted is carefully covered with plastic sheeting.
Now, some folks might think that’s just housekeeping on the job site, but trust us – it’s actually a key part of getting a great finish.
When you’re painting cabinets, you’re dealing with a whole lot of different materials in really close quarters – including stone, tile, appliances, woodwork, walls, ceilings, and flooring.
And if you’re just painting one material while leaving all the others in place… well, you really do need to take care of the boundaries between them.
Protecting what’s not getting painted is part of what makes professional painting what it is.
The end result’s a big part of why the final photos look so good – because we controlled the whole process from the start.
Why Cabinet Painting is All About the Details
When you look at a kitchen, the cabinets might seem like a big, solid piece of painted surface.
But they’re not – they’re made up of dozens of smaller elements, like:
- doors
- drawer fronts
- face frames
- side panels
- crown molding
- decorative trim
- toe kicks
- corners
- edges
- and all the transitions between one piece and another.
So, when you’re doing cabinet refinishing, you need to pay attention to the small stuff – consistency is key here.
You want the finish to look like one big, cohesive installation – not like a bunch of separate pieces.
In the White Plains after photos, the tall fridge enclosure, upper cabinets, lower cabinets, storage wall, and all that fancy crown molding work together like never before.
Instead of looking at a bunch of individual cabinet sections, you see an architectural wall of storage.
That is a pretty big difference.
After: The Cabinetry Became the Architecture of the Room
With the new finish, the cabinets changed role – they’re no longer the focal point, drawing attention to themselves.
Now, the lighter painted surfaces let the panel profiles and moldings be the real stars.
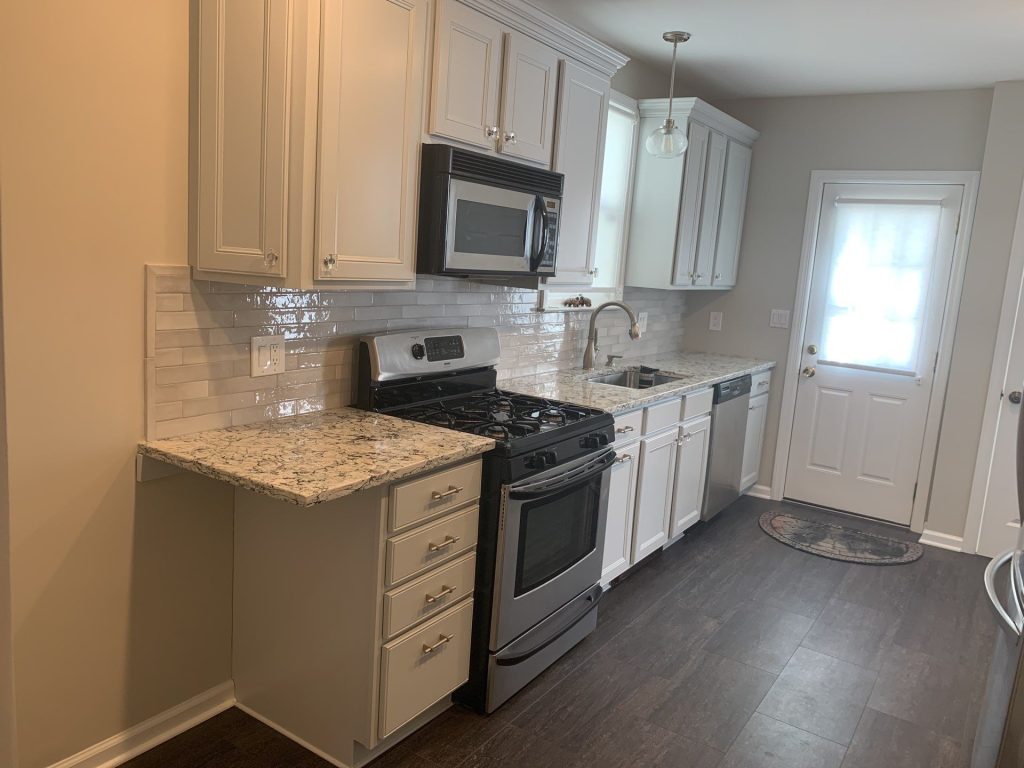

And that’s especially true when it comes to the crown molding – in the before photos, it was just one more bit of brown mass.
In the after photos, it’s the defining detail – the thing that makes the whole space pop.Once painted, those profiles become so much easier to make out and read.
Light and shadow start to take centre stage by making most of:
the crown steps,
door panels,
cabinet edges,
drawer fronts,
and the long tall pantry sections stand out.
The cabinet system starts to feel more like it’s a part of the architecture itself, not just some furniture plonked in the kitchen.
A Kitchen That Feels Lighter Without Telling the Granite to Leave
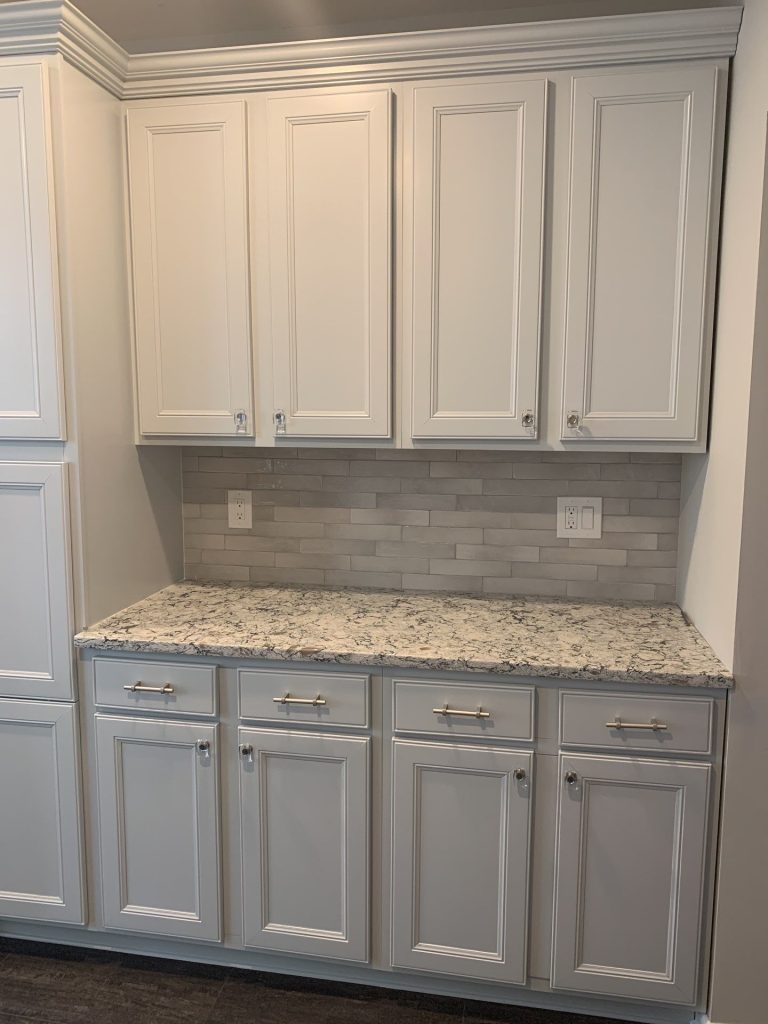
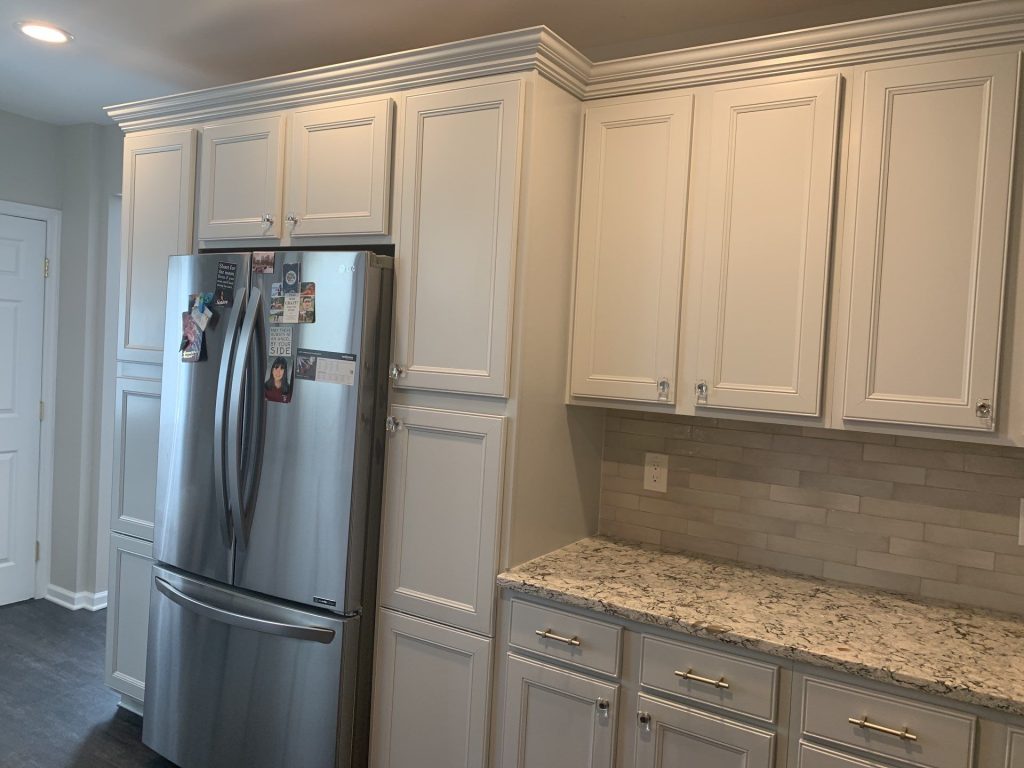
Another design lesson that came out of this White Plains project is that homeowners don’t always need to bin their existing finishes.
The granite stayed.
The backsplash stayed.
The stainless steel appliances stayed.
The layout stayed.
And yet, all of those elements look completely different now because the cabinetry around them got a fresh coat of paint.
That’s really useful to keep in mind when you’re planning an interior update:
You don’t necessarily need to bin everything that’s looking a bit dated. Sometimes just changing the dominant finish is enough to flip the whole room around.
The granite now has a lovely new partner in a much lighter finish colour.
The stainless steel is creating a much stronger contrast.
The neutral backsplash now feels like its meant to be there.
Even the dark flooring now feels more intentional because it’s contrasting with a brighter kitchen.
That Fridge Wall Shows the Transformation Like No Other
One of the most telling before-and-after comparisons is the cabinetry around the fridge.
Originally, those same tall stained wood cabinets created a big block of warm colour around the stainless appliance.
Now, after painting, those same tall cabinets have been lightened up and the fridge is no longer being engulfed by a heavy wood surround.
It’s become a metal accent, deliberately placed.
At the same time, painting the full-height cabinetry and upper moldings all the same colour really makes the whole installation feel taller.
That’s a really important design effect.
Light finishes don’t make your ceilings higher, but when the tall cabinetry and side panels and crown molding are all treated as one continuous light coloured structure, the eye moves up smoothly, with fewer interruptions.
So the kitchen can feel bigger, without needing one square foot more.
What Happens When You Paint the Backsplash – and Nothing Else
The backsplash is a great example of how colours interact with each other.
Before the project, the neutral tile was sandwiched between warm wood cabinetry and patterned stone counters.
But after the cabinets got painted, the same tile now looks loads better because its soft grey-beige tones are now blending in with the lighter cabinetry and granite.
This is more common than you might think.
A homeowner might say: “Our backsplash doesn’t work anymore”
Sometimes it really does need replacing, but other times the issue is just the finish next to it.
Before ripping out a permanent material like tile or stone, its worth thinking whether changing the paint colour around it might solve the visual conflict first.
Why the Crown Moulding is Such a Big Deal Here
That crown molding is one of the stars of this kitchen – and one of the easiest things to overlook.
It’s what creates a seamless transition between the cabinetry and ceiling. And in a kitchen with lots of different molding, any inconsistencies would be very noticeable.
Once all that molding is painted in a unified light finish, it makes the kitchen feel like it was built in, not just slapped together.
It also creates a visual connection with all the other painted trim throughout the house.
That’s really important in an interior painting project.
A kitchen shouldn’t feel like an isolated showroom sitting in the middle of an unrelated house.
The paint colours can help it feel like it belongs to the rooms around it.
And That’s As True for the Dining Room as it is for the Kitchen
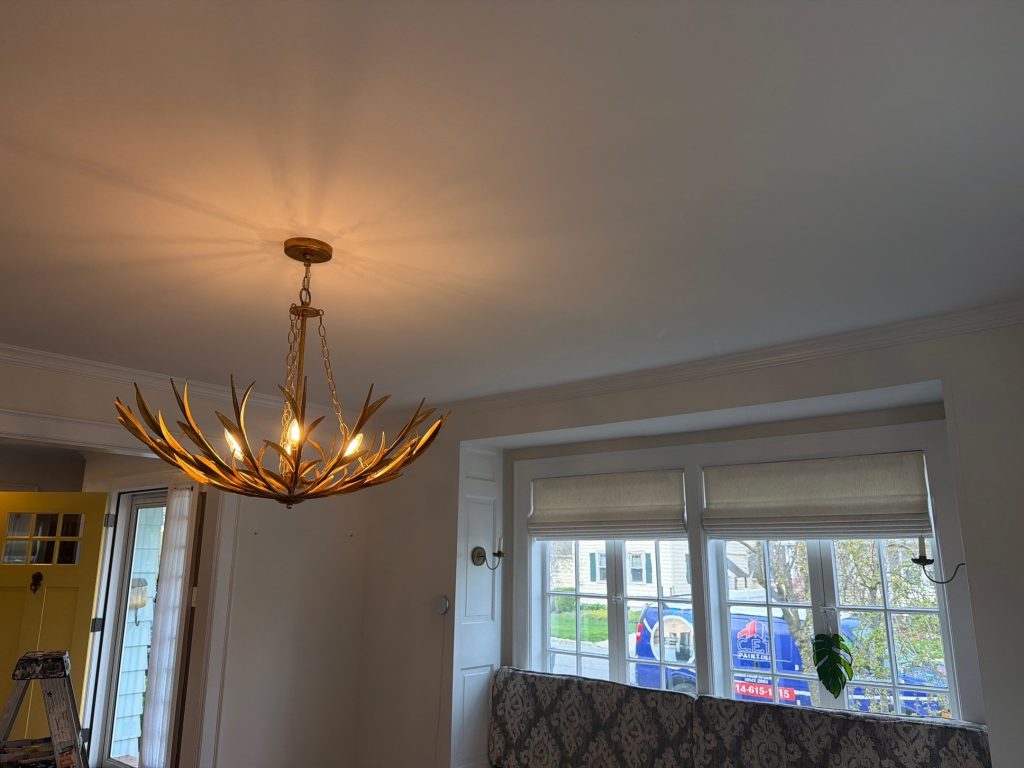
The attached photos also show the work flowing over into the surrounding living and dining spaces.
The walls and trim create a calm, light backdrop while the architectural details remain crisp.
That relationship makes the kitchen flow into the rest of the interior much more nicely.
This is why we prefer to think about interior painting room by room, rather than wall by wall.
When one space opens directly into another, the eye keeps going, it doesn’t stop at the doorway.
Ceiling lines keep going.
Trim continues on.
Wall colours interact with each other.
Natural light moves between rooms.
A painting plan that works well considers all those relationships, rather than treating every room as a separate project.
What We Kept Was Just as Important as What We Changed
This project wasn’t about replacing every single thing in the kitchen.
In fact, much of its success came from just keeping the right things.
The homeowners kept:
the existing cabinet structure,
granite countertops,
tile backsplash,
stainless appliances,
kitchen layout,
and all the decorative cabinet details.
Painting allowed those elements to stay, but then completely flipped the overall feeling of the space.
That makes this type of project especially appealing when the cabinetry is still functional and the homeowner likes the layout, but just doesn’t love the wood finish.
The Lesson Here: Ask Yourself “What’s Dominating the Room?”
Homeowners planning a kitchen update often start by making a list of everything that’s not working for them.
Try a different approach.
Stand in the doorway and ask yourself:
What single finish takes up most of the visual space?
In this White Plains kitchen, the answer was clear: the cabinetry.
So changing the cabinets was going to have a huge impact.
The same idea can apply elsewhere.
In another room, the dominant element might be:
a dark wall colour,
wood paneling,
built-in shelving,
a fireplace surround,
heavy trim,
or an oversized accent wall.Identify the dominant visual element first, to get a sense of what is calling the most attention.
You might be surprised to learn that you can transform the room without ripping out nearly as much as you initially thought.
Before and After: Same Kitchen – Different Visual Impact
The thing that’s most striking about these photos is how much stayed the same.
Take a closer look.
The counter top pattern still looks familiar,
the backsplash is still there,
the refrigerator hasn’t moved,
the stove and dishwasher are still in their same spots.
The kitchen layout hasn’t changed.
Yet, somehow the finished space feels entirely different.
That’s the power of adjusting visual weight
The dark, rich cabinet finish used to draw the eye straight to the cabinetry right off the bat.
The new, lighter finish lets your eye just wander around the room.
Now we can appreciate the texture of the counter top, the backsplash, even the cabinetry and appliances all at the same time – without any of them fighting for attention.
The Final Result
The finished painting project in White Plains feels like a breath of fresh air – like walking into a bright, clean space that works with the good stuff that was already there.
The cabinetry still has that classic raised-panel detail,
the crown molding is still really substantial,
the granite is still its own special beauty – with all its natural variation.
The stainless steel appliances are still a great contrast.
But that lighter finish really rearranges the whole composition.
Nothing has to pretend it’s something it’s not.
The kitchen just needed a finish that would let its strengths shine.
That’s why this project is more than just slapping on a new coat of paint.
It shows how interior painting can be a real design tool.
Home Interior Painting in White Plains, NY
If your kitchen still functions just fine but feels cluttered or dated, you might not need to rip out every last thing to fix it.
Sometimes a more useful question is:
“What would this room look like if we kept everything that’s good and just changed the finish?”
At CET Painting, our painting projects in White Plains and around Westchester County start with figuring out what needs to change – and what’s already worth leaving just as it is.
The key to a successful transformation is often not about starting over, but about changing how you see the room you’ve got.